

So here I present to you, a step by step process to install the nodemcu board or any board in general, in the arduino IDE.
Step 1:

Open the IDE and click on File -> Preferences
A new window will pop up. In the Additional Boards Manager URLs type the following:
http://arduino.esp8266.com/stable/package_esp8266com_index.json
After typing, click on "Ok"

Step 2:
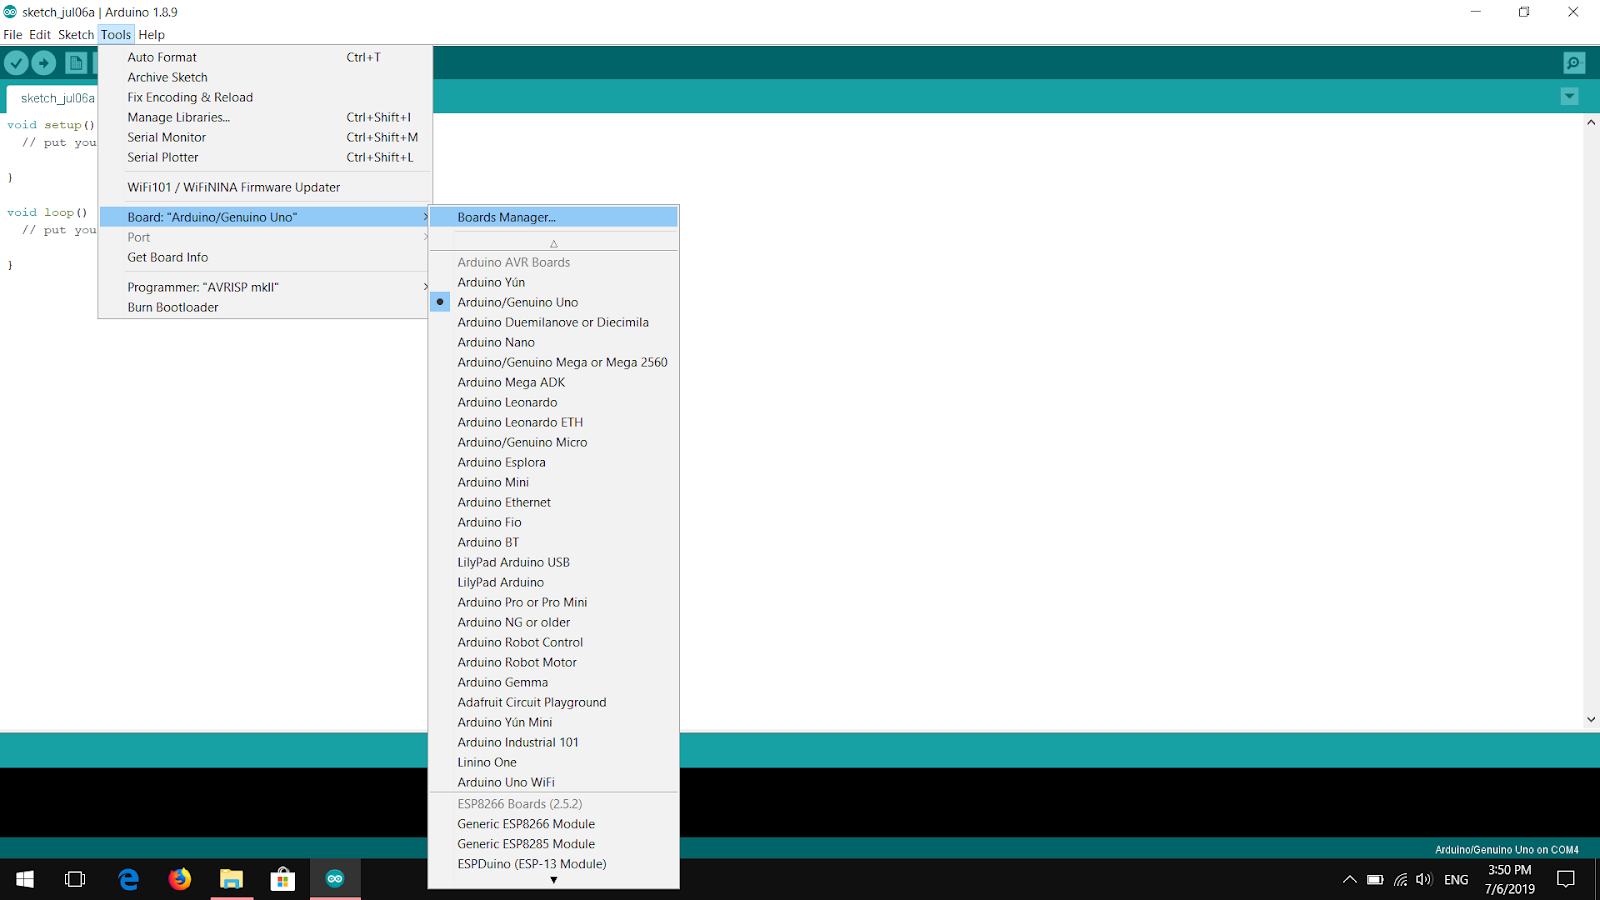
Go to Tools -> Board -> Board Manager
Another window will pop up. Wait for it to load everything.
Type "esp8266" in the search box
Install the one that says "esp8266 by esp8266 community"

Installing libraries in an easy way
Another common confusion occurs while installing libraries. If you search online, most websites tell you to download them from github and move the file to a folder in the arduino's files. But there is a simpler way that is straightforward.
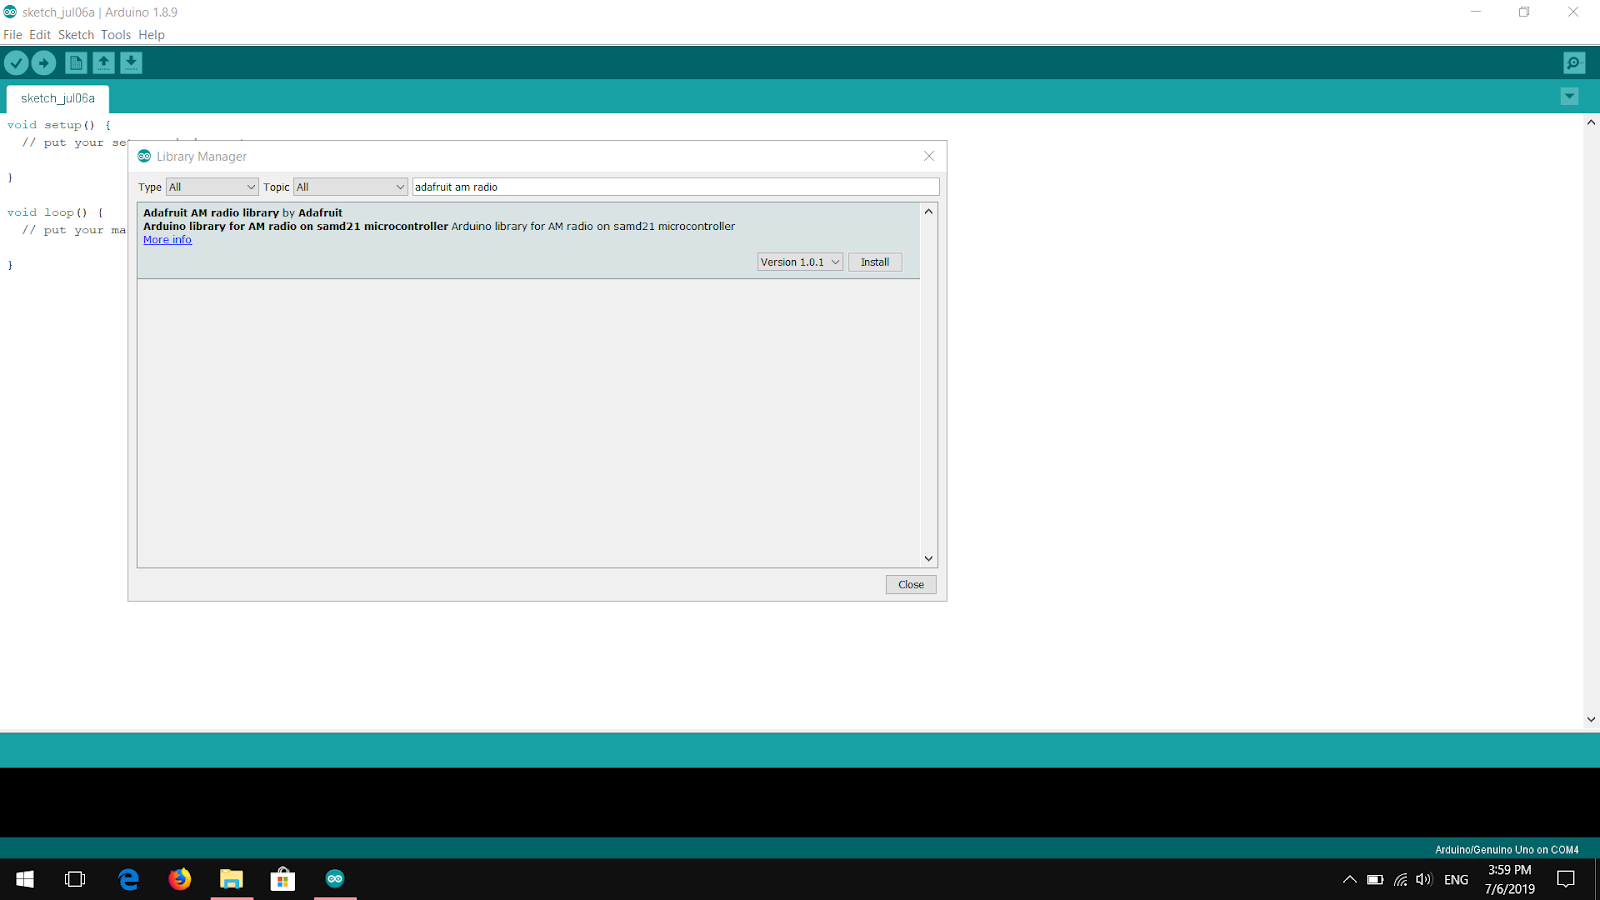
In the arduino IDE, go to sketch -> Include library -> Manage Libraries
A new window will pop up. In the search box, type the library name (for example, "adafruit am radio" or "blynk") and click on install. That's all!

Hope this guide got rid of the confusions you had. Good luck on your next IOT project!


0 Comments