

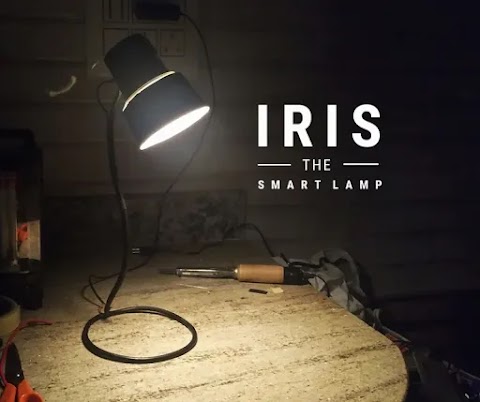
But if I want to make one myself, I would want it to have more features than just a standard lamp. The challenge was to find parts. Due to the countrywide lock down here in India, no electronic stores are open. This is my completely home built project. Meet Iris, the smart table lamp. It has as many features as I could push into it with the electronics I had at my house.
Manual mode: Usual desk lighting
Smart mode: Automatic detection of the user to turn on / off the light
Smart bed lamp: Automatically lights up your path when you want to go somewhere in the middle of the night
Adaptive brightness: Automatically adjusts brightness based on surrounding light
Daylight awareness: Can turn on smart mode automatically after sunset or when no other light source is around.
The last two features are yet to be added but I've mentioned the working principle so if you want to add them, you'll know what to do. Let's get making!
Supplies:
Yeah I know it doesn't really make sense to give purchase links because in most countries e-commerce sites aren't active at the moment. But in case you're reading this after this virus has come under control and everything is back to normal (which I hope happens soon), then...um.. you're welcome?
Arduino Uno: https://www.amazon.com/Arduino-A000066-ARDUINO-UNO...
Warm white LED strip: https://www.amazon.com/Flexible-16-4ft-Kitchen-Chr...
Single channel Relay: https://www.amazon.com/Electrical-Equipments-Chann...
Proximity/Obstacle sensor: https://www.amazon.com/DAOKI-Infrared-Obstacle-Avo...
12v Power supply: https://www.amazon.com/100-240V-Supply-Adapter-Swi...
GI wire
Black paint
Some parts here and there can be found at home.
Making the Stand

Now it wouldn't really be true if I said that the design of the base is completely my own. I saw this design in a video. But the execution is different, so yeah.
First of all, I took a thick mains cable. I wanted a black one, but this was the only one lying in my house. The problem is it's too flexible. We need something that can retain its shape once bent. So I removed the Aluminium wire inside and inserted a thick GI wire instead. Then I bent the wire into shape. This was as simple as making a circle for the bottom and then bending the rest of the wire in a thin S shape for the stand.
Unfortunately there was no more space inside to pass the power cables, so we'll do something about it later. The base is pretty much done.
The Top Of The Lamp

For this, I took two plastic containers from the kitchen. Both are a little tapered and one is bigger than the other. I marked a line along the larger container and cut it short.

When the small container is placed on top of the large one, it looks exactly like a lamp. Great!
The Bulb


I soldered the wires keeping both the strips in parallel. I then popped open the diffuser from an old LED light bulb and stuck it on top of the lid.
Our custom LED bulb is ready!

I did a quick test with a 12v power supply. You can see how pleasant it looks already.
Paint It Black

I painted everything black. Make sure to use a sandpaper to make the surface of the containers rough so that the paint can properly stick to it.
It's best to use spray paint, but I didn't have one at home. So I used acrylic paint. It was really hard to paint the base because the paint kept coming out. After three coats, I was satisfied with the look. Although I should have sanded it too before painting.
I didn't paint the top of the large container because it was semi transparent and would form a cool light ring when powered on.
The Electronics


Relay output: The relay switches the lamp on/off when it's in smart mode. It's input pin goes to Arduino's pin 3 and the other pin goes to Arduino's GND pin.
The rest of the connections are pretty simple. Just follow the schematic diagram. It'll be a little easier if you know what's happening.

Basically, if you slide the switch to the right, you're directly powering the lamp from the supply. When you slide the switch to the left, the lamp is in smart mode. From here onward, the lamp is controlled by the Arduino. Basically by sliding the switch to the left, you're disconnecting the power supply from the lamp and powering the Arduino instead. If the Arduino wants to power the lamp, it'll trigger the relay which is just shorting the previously disconnected switch terminals.

All these smart features are controlled by the Arduino. Our program decides how they work. If you want it to work the same was as mine does, you can just copy and paste my code (provided below) and upload to your Arduino. In case you want to understand the code and tweak it to your own liking, I'll do a code walk through at the end of the post which you can refer.
As I mentioned earlier, this code only reads data from the obstacle sensor. The adaptive brightness and daylight awareness features aren't yet added. I'll explain this in the code walk through part so you can add them if you like.
void setup() {
// put your setup code here, to run once:
pinMode(2,INPUT);
pinMode(3,OUTPUT);
}
void loop() {
// put your main code here, to run repeatedly:
if(digitalRead(2))
{
digitalWrite(3,HIGH);
delay(15000);
}
else
digitalWrite(3,LOW);
}
How Does It Work?

The bedside lamp feature:
This is not a separate feature actually. It's the existing obstacle sensor but with its range increased by turning it's potentiometer. If your lamp and desk arrangement is kept next to a bed, when you get off the bed, it detects you and turns the lamp on for 15 seconds, after which the lamp turns off. You can keep the lamp focused to your pathway before sleep so that it lights it up.
Assemble

Once all the electronics are properly connected and tested, I fixed them in a small box. I could attach them to the lamp, but I wanted it to look minimalistic, so the electronics were separately mounted on the bottom of the table. Perfect position for the obstacle sensor and hidden from view.
I stuck one power wire along the stand using
superglue. What about the other wire? Remember we inserted a GI wire
through the stand? We're going to use that as another wire. This will
keep everything neat looking.


The code not only looks, but it actually is pretty simple.
First, we declare the input and output pins of the Arduino in the setup function.
Pin 2 is receiving input from the sensor. So if it reads HIGH, which means someone is close to it, it turns on the relay (pin 3) for 15 seconds. After 15 seconds, if pin 2 is still reading high, the if block keeps getting executed and the lamp remains on. Otherwise, the relay is switched off and so is the lamp.
In case you would want it to work automatically after sunset, all you have to do is add an LDR with a general purpose transistor to another pin. Then, the whole code above is placed inside an if block. When the LDR reads no light, the if block gets executed and the process explained above is carried out by the Arduino.
Also, for the automatic brightness control, you'll need to use an LDR again. The lamp should now be powered directly from the Arduino for which another relay can be used. You can use PWM to adjust the brightness of the lamp based on the analog input from LDR. Note that for this, you'll have to use a 5v LED strip instead of a 12v.
Additional Features and Tweaking
So now there might be one problem. How to switch between the smart mode for user detection and smart bedlamp mode? In the code I've provided, both are basically the same thing. But if you want a dedicated mode for each one and switch between them automatically, you can use a Nodemcu (esp8266) microcontroller instead of an Arduino.
You can use a service called IFTTT to trigger each mode based on the time and your schedule automatically. Also, you can add more features like controlling your lamp from your smartphone, weather alerts, timers and a lot of other things easily. This can make Iris truly smart. Unfortunately my nodemcu is back in the hostel so I'm stuck with Arduino. I'll add these features once I get back and maybe make another post!


0 Comments